
Guia especializado:etapas de treinamento rápidas e eficazes para filhotes
Esta postagem pode conter links afiliados. Podemos ganhar dinheiro ou produtos das empresas mencionadas nesta postagem.
 © Depositphotos.com / jeanro
 Acho que você concordará comigo quando digo:
Uma das primeiras e mais importantes coisas que você precisa aprender como novo dono é como treinar um cachorrinho em casa...e rápido!
Bem, acontece que você pode diminuir drasticamente o tempo que leva para treinar seu filhote em casa, superando os dias de pisos e carpetes limpos muito mais cedo, armando-se com apenas um pouco de conhecimento e seguindo um plano bem definido.
E neste artigo, apresento um método passo a passo detalhado a seguir que fará com que a casinha do seu cachorrinho seja treinada no tempo mais rápido possível, com o mínimo de ‘acidentes’, bagunça e limpeza ao longo do caminho.
Não prometo nenhuma ‘pílula mágica ‘ou’segredo do treinamento em casa ‘isso terá sua casinha treinada em uma semana. Esse segredo não existe e o tempo que leva varia de cachorro para cachorro e de dono para dono.
Mas o que ofereço é um guia completo, escrito a partir de inúmeras horas de pesquisa e da minha própria experiência de treinamento doméstico, que me ensinou o que funciona e o que não funciona.
Se você seguir este guia com paciência, consistência e dedicação, posso garantir que você e seu filhote passarão de iniciantes a craques do treinamento doméstico o mais rápido e sem estresse possível.
DICA RÁPIDA: Para ajudar a reduzir o número de acidentes em sua casa, certifique-se de remover completamente o cheiro de urina. Recomendamos um limpador enzimático como o Puppy In Training Stain &Odor Eliminator.
Como usar este guia
‘Como treinar um cachorrinho em casa ‘é o 11º artigo da minha série ‘Guia definitivo para treinamento doméstico’.
Os 10 artigos anteriores contêm uma riqueza de informações de apoio que respondem a muitas das perguntas mais comuns sobre treinamento doméstico e fornecem o conhecimento para você tomar decisões informadas sobre o método e estilo de treinamento para usar o penico que seguirá.
No entanto, criei propositadamente este ‘como fazer ‘Guia o mais completo e independente possível, portanto, a leitura dos artigos anteriores não é essencial.
Repito as informações mais importantes aqui com menos detalhes e, em seguida, linko para esses artigos se desejar uma leitura mais detalhada e uma compreensão mais profunda.
Para usar este guia, recomendo lê-lo completamente do início ao fim, então você terá coberto tudo o que precisa saber para treinar um filhote em casa com sucesso.
Estou avisando, este artigo é longo. Muito longo. Provavelmente você levará 15 minutos para ler. Mas o que você aprenderá, a melhor maneira de treinar um filhote em casa o mais rápido possível, irá compensar o tempo investido centenas de vezes nas primeiras semanas e meses com seu filhote.
E se você marcar este guia como favorito, poderá usá-lo como referência clicando no índice acima para levá-lo diretamente a qualquer seção, caso precise refrescar sua memória sobre um tópico específico.
Então vamos começar…
RECOMENDAÇÃO RÁPIDA: Outra ferramenta que adoramos para treinar em casa é a campainha com penico para cachorro, Smart Bell. É preciso um pouco de treinamento, o Smart Bell avisa quando seu cachorrinho precisa ir ao banheiro e também é ótimo para trabalhar na deixa “Toque”.
As duas chaves essenciais para um treinamento doméstico bem-sucedido
Com 8 semanas de idade, um filhote não sabe melhor do que fazer xixi ou cocô em qualquer lugar onde esteja quando a vontade surgir.
Eles não têm ideia de que não é assim que deve ser feito ou que você não acha aceitável usar penico em seus tapetes.
Cabe a você escolher um local adequado para o banheiro, treinar seu filhote para usá-lo e ao mesmo tempo ensiná-lo que não é aceitável usar penico em nenhum outro lugar da sua casa.
Para conseguir isso existem 2 chaves essenciais para o sucesso. 2 chaves que são o objetivo final de qualquer método ou técnica que você encontrar:
- Você precisa evitar erros dentro de sua casa.
- Você precisa elogiar seu filhote por usar o penico no lugar certo tantas vezes quanto possível.
Uma grande parte para conseguir isso é simplesmente levar seu filhote ao banheiro designado com frequência.
Dessa forma, você terá o maior número de oportunidades para elogiá-los por fazerem a coisa certa. E porque eles estão vazios, você também diminui a necessidade de usar o penico quando estão nos lugares errados.
Mas não é tão simples assim. Você também deve evitar erros em sua casa através de uma mistura de confinamento e supervisão concentrada. E ajuste essa tarefa 24 horas por dia, 7 dias por semana, ao seu estilo de vida e rotinas atuais.
Fazer isto é tanto uma arte como uma ciência, necessitando de uma abordagem bem pensada e altamente planeada para dar ao seu cachorro a maior oportunidade possível de fazer a coisa certa, ao mesmo tempo que limita as oportunidades de fazer a coisa errada.
E este guia mostrará exatamente como.
Como treinar um filhote em casa:perguntas frequentes
Por quanto tempo um cachorrinho consegue segurar a bexiga? Quantas vezes um cachorrinho precisa ir ao banheiro por dia? Quanto tempo levará até que seu filhote esteja completamente treinado em casa?
Há muitas perguntas que um proprietário terá ao iniciar o treinamento doméstico e há muita desinformação escrita por aí.
Então, para responder às perguntas mais frequentes, escrevi o seguinte artigo:Necessidade básica de saber os fatos antes de começar.
Recomendo que você leia esse artigo para ter expectativas realistas em relação ao seu filhote e a você mesmo, para saber o que ambos podem alcançar em que prazo.
Como você deve abordar o processo
 © Depositphotos.com / nasirkhan
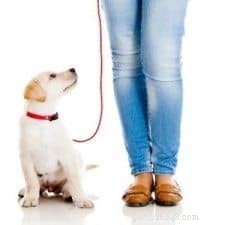
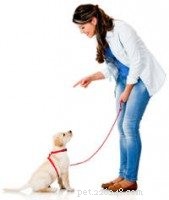
 Como o seu cachorro não tem ideia do que você está pedindo ou por quê, você é a parte mais importante no processo de treinamento doméstico.
Cabe a você ensinar-lhes hábitos de banheiro aceitáveis e deve fazê-lo de uma maneira que seja o mais fácil de entender e o mais livre de estresse possível.
A maneira como você aborda as coisas terá um efeito dramático sobre o andamento das coisas, tanto que dediquei um artigo inteiro ao assunto:A mentalidade e a abordagem que você deve adotar para o treinamento doméstico.
No artigo discuto métodos tradicionais que nunca devem ser usados, por que não deveriam e o que você deveria fazer em seu lugar.
Abordo como você deve assumir o papel de guia e treinador, deve ser paciente e compreensivo, mas firme e consistente.
Abordo como trabalhar com os instintos naturais do seu filhote, a melhor maneira de lidar com acidentes em casa e como o treinamento para ir ao banheiro estabelece a base de seu futuro relacionamento juntos.
É uma leitura importante para qualquer pessoa prestes a embarcar em um programa de treinamento doméstico, por isso recomendo que você leia antes de continuar com este guia.
Por que você não deve permitir que seu filhote corra pela casa inteira
Restringir o acesso do seu cachorro à sua casa até que ele seja confiável é uma das melhores coisas que você pode fazer para um caminho mais rápido e limpo para o sucesso.
Os cães têm o instinto de não fazer suas necessidades dentro da toca, local onde comem e dormem. Sua tarefa é convencer seu filhote de que toda a casa é sua toca e que ele não deve sujar nenhum lugar dentro dela.
Isso é muito mais fácil de fazer se você inicialmente restringir seu filhote a apenas um cômodo da sua casa, convencê-lo a mantê-lo limpo primeiro e depois expandir lentamente as áreas em que eles podem entrar.
Os cães não generalizam bem, então mesmo que saibam que não devem fazer penico na sua cozinha, eles não vão pegar essa ideia e aplicá-la no seu quarto.
Você tem que ensiná-los a não fazer penico no seu quarto quase como uma ideia separada.
Se você permitir o acesso a toda a sua casa imediatamente, seu filhote não a verá como um lugar grande, mas como muitos lugares separados e totalmente diferentes.
Mas se você começar aos poucos, restringi-los e treiná-los para usar o penico em uma área e, em seguida, expandir aos poucos, será mais fácil para o seu filhote associar a nova área ao espaço de vida que ele deve manter limpo.
Isso irá acelerar o processo de arrombamento da casa e, ao mesmo tempo, diminuir o número de acidentes que seu filhote sofrerá e o número de limpezas profundas que você terá que fazer. Uma situação vencedora no livro de qualquer pessoa!
Lista de verificação de equipamentos
 © Depositphotos.com / tairen10
 A seguir está uma lista de itens e produtos de que você precisará para ajudá-lo a treinar seu filhote para ir ao banheiro.
Alguns são essenciais, outros são opcionais e o que você precisa dependerá do método escolhido.
Você será capaz de determinar o que precisa assim que terminar o guia e conhecer seu plano de ação.
- Colar
- Trela
- Uma caixa adequada
- Um cercadinho para cachorrinhos, portões para bebês ou barreiras para animais de estimação
- Plástico ou lona
- Almofadas e porta-cachorros – ou uma pilha de jornais velhos
- Sacos para cocô de cachorro e uma pá para cocô
- Pequenas guloseimas como recompensa
- Produtos de limpeza
- Uma lanterna preta ou UV
Se você quiser uma descrição detalhada de como e por que esses itens são tão úteis, como cada um deve ser usado e como ajudam durante o treinamento em casa, consulte meu artigo:
Produtos, suprimentos e equipamentos necessários para treinamento doméstico
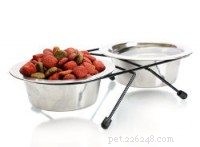
Alimentos e água desempenham um papel extremamente importante!
 © Depositphotos.com / belchonock
 O que você alimenta e como você alimenta seu filhote tem um impacto incrível no processo.
Escrevi um artigo detalhado sobre como as escolhas alimentares fazem uma enorme diferença durante o treinamento em casa, que você pode ler clicando aqui.
Nele há uma discussão detalhada sobre a influência que suas escolhas alimentares terão no seu sucesso e muitos conselhos sobre como alimentar seu filhote.
Claro que eu recomendo fortemente que você leia, então você pode voltar informado e pular esta seção para a próxima. Mas para quem tem pouco tempo, os pontos principais do artigo são os seguintes:
Alimentos de alta qualidade resultam em menos evacuações todos os dias
Alimentos de baixa qualidade estão cheios de recheios baratos, têm baixo valor nutricional e são difíceis de digerir, resultando em mais passagem.
Considerando que os alimentos de alta qualidade são ricos em nutrientes, são facilmente digeridos e mais são absorvidos, o que significa menos passagem.
Portanto, alimentos de alta qualidade fazem com que seu cão produza menos fezes por dia, o que é obviamente ideal para treinamento doméstico.
Alimentos de alta qualidade ajudam seu filhote a aprender a controlar o intestino
Como um filhote extrai mais nutrientes de alimentos de alta qualidade e menos substâncias baratas fluem diretamente, suas fezes ficam mais firmes e isso os ajuda a aprender a controlar o intestino.
O que entra de acordo com uma programação, sai de acordo com uma programação
Como a comida viaja pelo sistema do seu filhote em um ritmo razoavelmente consistente, se você alimentá-lo nos mesmos horários todos os dias, eles entrarão em um padrão de eliminação nos mesmos horários todos os dias.
Você pode então basear um cronograma nesses horários, seu filhote aprenderá a esperar uma pausa para ir ao banheiro nesses horários e o treinamento em casa se tornará mais fácil para vocês dois.
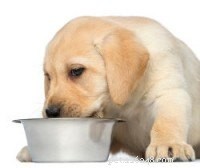
Não alimente seu filhote de graça, siga o cronograma
 © Depositphotos.com / lifeonwhite
 Se, em vez de seguir horários rígidos de alimentação, você deixar comida para o seu filhote o dia todo, ele poderá beliscar e comer a comida em horários aleatórios.
Isso é conhecido como “alimentação gratuita” e é a pior coisa que você pode fazer até que seu filhote conheça hábitos de toalete adequados.
Ao comer em horários aleatórios, eles também precisarão fazer cocô em horários aleatórios.
Sem um padrão regular e previsível de quando seu filhote precisa fazer cocô, o treinamento em casa será mais difícil.
Portanto, faça com que seu filhote coma de acordo com um horário e pegue a tigela de comida entre as refeições, vazia ou não.
Atenha-se a uma marca de ração para cães
Mudanças drásticas na dieta muitas vezes levam a fezes moles ou diarréia, seu filhote se torna fisicamente incapaz de segurá-lo e esta é a pior coisa que pode acontecer durante o treinamento em casa (sem mencionar toda a limpeza que você terá que fazer! )
Escolha uma marca única de ração para filhotes, de alta qualidade e nutricionalmente balanceada e cumpra-a. Aquele que o criador do seu cachorro usou geralmente é a melhor escolha para que o seu cachorro não precise passar por uma mudança.
Se você precisar escolher uma nova marca de ração ou estiver pensando em mudar para algo melhor, listamos aqui alguns dos melhores alimentos para filhotes de Labrador e cães grandes (abre em uma nova janela).
Disponibilidade de água
Você deve disponibilizar água gratuitamente para o seu filhote ao longo do dia, monitorar sua ingestão para poder avaliar se ele está ingerindo muito ou pouco, mas não restrinja o acesso, pois suas necessidades podem variar.
O importante a fazer é retirar-lhes o acesso à água nas últimas 2 horas antes de dormir, caso contrário terão de passar muitas vezes durante a noite, o que claro que você não quer.
Você deve limpar profunda e completamente para evitar ‘erros’ repetidos

Os cães são atraídos de volta aos lugares pelo cheiro de sua própria urina para usar o mesmo local como banheiro repetidamente.
E seu olfato é tão apurado que mesmo o menor vestígio de urina é suficiente para encorajar uma repetição do desempenho.
Portanto, após cada acidente, é essencial que você limpe meticulosamente a área, removendo até o último vestígio de urina e seu cheiro. Do contrário, há uma grande chance de seu filhote formar outra pequena poça.
Isso pode arruinar seus esforços porque incentivá-los a usar o penico dentro de sua casa é exatamente o oposto do que você está tentando alcançar.
Os produtos de limpeza domésticos comuns simplesmente não fazem um trabalho bom o suficiente na eliminação de odores, então você realmente precisa usar um removedor de manchas e odores especialmente projetado para essa finalidade.
E você precisa seguir um método passo a passo que garanta resultados.
Para conselhos sobre os produtos de limpeza que deve escolher, aqueles que simplesmente deve evitar, como encontrar manchas de urina escondidas (com luz UV) e um processo passo a passo para uma limpeza rápida e completa, consulte o meu artigo:
Acidentes acontecem:como remover manchas e odores de animais de estimação.
Um banheiro externo ou interno? – Ou ambos?
Antes de começar a usar o penico, você precisa tomar uma decisão muito importante:seu cão terá um banheiro externo, interno ou talvez ambos? E como você deve decidir?
Meu conselho é:Escolha um banheiro externo, a menos que você tenha um bom motivo para fazer o contrário.
Treinar um cachorro para ir ao banheiro exclusivamente ao ar livre é mais fácil para o seu filhote entender, mais fácil para você treinar e mais gentil com seu nariz.
Mas se você tem problemas de mobilidade ou mora no último andar de um prédio alto, sair rapidamente é impossível.
Então você deve escolher um local para banheiro dentro de sua casa, pelo menos até que seu filhote desenvolva um forte controle da bexiga.
Você pode escolher uma mistura dos dois fazendo com que seu cachorro vá ao banheiro do lado de fora quando você estiver lá, mas dentro de casa, em blocos ou papel, quando você não estiver.
Isso é adequado se você tiver que trabalhar o dia todo ou ocasionalmente deixar seu cão sozinho por muitas horas.
Muitos proprietários deveriam treinar seus filhotes no papel, ‘por precaução’
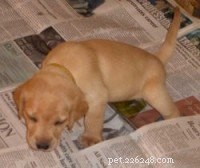
É uma boa ideia ‘treinar no papel’ seu filhote para ir ao banheiro dentro de casa quando estiver na área de confinamento, mesmo que seu plano final seja que ele só vá ao banheiro fora.
Isso ocorre porque, dependendo da idade do filhote, é fisicamente impossível para ele segurar a bexiga por mais de algumas horas até crescer.
Pessoalmente, sempre descobri que, com todos os cães que já tive, sempre houve momentos em que tive que deixá-los sozinhos por 3, 4, talvez 5 horas. Planejo que isso não aconteça, mas ocasionalmente acontece.
Você não pode colocar um filhote na caixa por tanto tempo, então você deve ter um plano alternativo. E isso significa confiná-los a um cercado de exercícios ou a um único cômodo pequeno com uma área forrada de papel para eles usarem o penico.
Portanto, embora quando estou em casa eu esteja vigilante e treinando ativamente meu filhote para ir ao banheiro ao ar livre, também tenho que treiná-lo no papel para as ocasiões em que não estou em casa.
Depois de conversar com muitos amigos e proprietários, sei que este é um cenário comum para muitos.
Considerações para um banheiro externo
Muitas pessoas permitem que seus cães usem todo o quintal como banheiro, desde que seja ao ar livre. Mas você pode considerar treiná-los para usar apenas um local específico de cada vez.
Se eles puderem ir a qualquer lugar do quintal, é muito provável que você não consiga encontrar e coletar todos os seus excrementos, o que não é uma coisa boa se você tiver crianças brincando lá ou 'depósitos' de cachorrinhos ao redor de sua bela espreguiçadeira.
Você também pode descobrir que a urina do seu cão causa “queimadura no gramado”, onde a grama fica marrom em áreas usadas regularmente do gramado.
Além disso, se eles urinarem regularmente perto de uma porta ou debaixo de uma janela, pode causar um mau cheiro em sua casa, especialmente no verão. Mas…
Se você treiná-los para usar apenas um único local, seu quintal ficará mais limpo e higiênico para todos os outros usuários, você não terá o problema de grama queimada com nitrogênio e será muito mais fácil manter seu quintal limpo.
Portanto, faz todo o sentido treinar seu cão para usar sempre uma área específica.
Uma área longe de portas, janelas, churrasqueiras ou áreas de lazer. Mas, por favor, não pense que se você escolher um local “fora do caminho”, poderá se esquivar das tarefas de limpeza.
Os cães gostam de ir aonde possam sentir o cheiro que já estiveram antes, mas ainda assim deve estar limpo. Portanto, se você quiser que eles continuem usando um único local, você ainda deve pegar o que puder e limpar regularmente a área.
Considerações para um banheiro interno
Ao escolher um penico interno, a primeira coisa que você deve ter em mente é que você tem que conviver com o cheiro.
Devido às limitações de espaço nem sempre é possível, mas deve-se tentar evitar locais como quartos, áreas onde as crianças brincam ou qualquer lugar onde prepare ou guarde alimentos. Isso não deixa muitas opções!
Os locais ideais são qualquer cômodo pouco usado:um quarto de hóspedes, a lavanderia ou um banheiro pouco usado.
Outra consideração é a superfície em que você coloca o banheiro do seu cão. Para penico interno com cães sempre haverá o risco de acidentes e extravios.
Então, se puder, coloque o banheiro do seu cachorrinho em um piso de cerâmica ou linóleo. Ou se for em uma área acarpetada, coloque uma folha de plástico embaixo do vaso sanitário para proteger o chão e facilitar a limpeza.
Almofadas para cachorros, papéis, bandeja sanitária ou caixa de grama para uso interno?
Existem muitas opções para usar como penico interno. Caixas de relva, lixeiras, algumas novas têm até ralos que recolhem os resíduos em tanques de armazenamento…a lista já é quase interminável.
Então, qual você deve escolher?
Pessoalmente, sempre treino meus cães para usar o penico ao ar livre e não forneço um banheiro interno permanente para eles.
Portanto, nunca considerei caixas de grama ou bandejas sanitárias, optando por usar papel e almofadas para filhotes se precisar deixá-los sozinhos em casa por mais tempo do que conseguem segurar a bexiga.
Mas se você precisar fazer uma escolha:Quais são os prós e os contras de cada um?
Almofadas para cachorros
[amazonfields=”B01MPWFYZA” value=”thumb” image_size=”large”tracking_id=”labradortraininghq-20″ image_class=”ais200fr”] As almofadas para filhotes são altamente absorventes e podem ser colocadas em uma bandeja com bordas elevadas, diminuindo respingos e tornando a limpeza relativamente fácil.
Muitas vezes, eles ficam impregnados de um cheiro para atrair um filhote para fazer suas necessidades, para que possam ajudar a acelerar um pouco o processo de treinamento doméstico. Eles também ficam melhor em casa do que em uma área coberta com papel (levemente).
A desvantagem é que eles não cobrem uma área tão ampla quanto o papel pode e já ouvi histórias de cães que aprendem a gostar de despedaçá-los, mas acho que isso é verdade para a maioria das coisas!
Artigo

O papel é muito barato e se você usar jornais velhos é quase grátis! Assim, você pode cobrir uma ampla área com um custo muito baixo enquanto seu filhote é jovem e inexperiente.
No entanto, a urina muitas vezes escorre do papel antes de ser absorvida, por isso os derramamentos são mais comuns e a limpeza é mais difícil. Além disso, o xixi pode encharcar o papel até o chão com mais facilidade, embora você possa usar uma bandeja como almofadas para filhotes, se desejar.
Finalmente, é muito fácil para o seu cachorro rasgar o papel e espalhá-lo onde um bloco fica mais contido quando colocado em uma bandeja.
Bandejas de lixo
[amazonfields=”B00G7RMCHO” value=”thumb” image_size=”large” tracking_id=”labradortraininghq-20″ image_class=”ais200fr”] Uma bandeja sanitária é fácil de limpar com areia altamente absorvente absorvendo os resíduos e as laterais altas da bandeja fazendo um bom trabalho em manter tudo contido. Também parece melhor do que uma propagação de jornais.
Mas os principais problemas com a ninhada são que alguns cães a veem como um lanche, ela pode sair da bandeja e ser pisada pela casa quando grudada nas patas e Deus me livre de ter um cachorro que tenta enterrar seus dejetos!
Caixa de grama
[amazonfields=”B002DCWA4C” value=”thumb” image=”2″ image_size=”large”tracking_id=”labradortraininghq-20″ image_class=”ais200fl”] As caixas de grama estão disponíveis com opções de grama genuína ou sintética.
Eles funcionam bem porque parecem tão diferentes do chão ao redor que um filhote pode facilmente distingui-lo como uma área de penico, seu cão sente uma sensação de grama macia sob seus pés e eles fazem um bom trabalho em manter tudo contido.
A desvantagem é que são as opções disponíveis mais caras e alguns cães desenvolvem o hábito de tentar cavar e mastigar a caixa de grama como fariam com um pedaço de grama externo.
O que eu recomendo?
Recomendo usar jornais com cachorrinho bem pequeno, confinado em um único cômodo com piso fácil de limpar.
Depois que seu filhote estiver acostumado a usar o papel, corte a área coberta no tamanho de apenas algumas folhas e, em seguida, coloque as almofadas em uma bandeja em cima do papel e incentive seu filhote a usá-las.
O papel é tão barato que você pode usá-lo em abundância com um novo filhote até que ele esteja pelo menos semi-treinado e depois mudar para almofadas para filhotes para que a tarefa de limpeza seja mais fácil.
Se você só precisa usar um penico interno com seu cachorrinho até que ele amadureça, aprenda a controlar a bexiga e depois use exclusivamente o exterior, eu nunca consideraria uma caixa ou bandeja de grama.
Mas se você pretende usar um banheiro interno por um longo prazo, você pode considerar caixas de grama, bandejas sanitárias ou até mesmo um dos banheiros internos mais modernos e criativos disponíveis.
Existem alguns banheiros modernos para cães disponíveis que precisam apenas de limpeza semanal, alguns que eliminam odores e muitos que parecem melhores do que papel ou almofadas para cachorros como uma característica permanente de uma casa, então você pode querer pesquisar algumas dessas opções.
Quatro métodos para escolher para treinar seu filhote em casa
Existem 4 métodos amplamente utilizados e recomendados que você pode escolher, embora a realidade seja que você quase certamente usará uma mistura de 2 ou mais.
Esses métodos são:
- Treinamento sobre artigos
- Usando uma casinha de cachorro
- Supervisão Constante
- Treinamento do cordão umbilical
Ao longo do restante deste guia, me referirei a cada um desses 4 métodos e quando você deve ou pode usá-los.
Para ter certeza de que você tem uma compreensão decente do que é cada método e o que eles envolvem, darei um breve resumo de cada um.
Também colocarei links para artigos mais detalhados que escrevi sobre cada método para aqueles que desejam uma compreensão mais detalhada.
Treinamento em papel
 © Depositphotos.com / agencyby
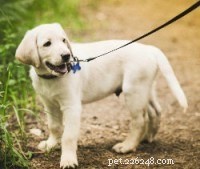
 O treinamento em papel é o método mais conhecido e mais comumente usado para treinamento doméstico em todo o mundo.
Aqui está um breve resumo da técnica:
Descrição: O treinamento com papel é ensinar seu filhote a usar o banheiro dentro de casa em uma ampla área de jornais ou almofadas pré-tratadas que incentivam o filhote a usar a área como banheiro.
Uma vez acostumado a usar o papel ou os blocos, você corta lentamente a área coberta até que eles usem apenas algumas folhas e nunca percam.
Você então move lentamente o papel para fora, onde outro conjunto é colocado e começa a incentivar seu filhote a sair apenas, antes de remover completamente os papéis de dentro. Neste ponto eles terão feito a transição.
Uma dica importante no treinamento do papel é que, ao limpar o papel sujo, você deve segurar um pedaço e colocá-lo como uma camada intermediária dos novos papéis.
As almofadas para filhotes têm um cheiro que atrai o filhote, o papel não.
Mas ao guardar um pedaço de papel levemente sujo com o cheiro da urina do seu cachorro, você obtém o mesmo efeito de atrair o seu cachorro para fazer as necessidades onde quiser.
Eficácia: Numa escala de 1 a 5, dou nota 3.
Ele não pode ter uma pontuação mais alta porque você os está treinando para ir ao banheiro dentro de casa antes de treiná-los novamente para não fazê-lo! Isso é confuso e tornará o processo de aprendizagem mais demorado.
Também leva a que erros (fazer uso do penico por dentro) sejam cometidos muito mais tarde na vida de um filhote, em comparação com os outros métodos, especialmente quando eles veem qualquer papel que tenha sido deixado por aí.
Mais adequado para: Tanto as pessoas que vão ter um banheiro interno por um longo prazo, quanto as pessoas que não vão usar uma caixa para treinar, mas não podem se comprometer a supervisionar constantemente seu filhote quando dentro de casa.
Mas também é um bom plano alternativo para todos usarem nos momentos em que precisam deixar o filhote sozinho em casa por mais tempo do que o esperado para segurar a bexiga.
Facilidade de uso: Numa escala de 1 a 5, definitivamente um 5.
É um método muito fácil de usar, exigindo o mínimo de esforço de sua parte quando comparado a qualquer outra técnica.
Mas isso resulta em mais erros do seu filhote até mais tarde na vida. Assim, você pode ser mais passivo e menos envolvido no início, mas terá mais limpeza para fazer mais tarde na vida do seu filhote em comparação com outros métodos.
Equipamento necessário: Nada além de pilhas de jornais velhos! Um método muito econômico.
Mais informações: Para uma discussão detalhada sobre o treinamento com papel, prós, contras e algumas dicas de especialistas, consulte o seguinte artigo:Como treinar seu filhote ou cachorro com papel da maneira mais fácil
Treinamento em caixa
[amazonfields=”B001DRY8Z2″ value=”thumb” image_size=”large”tracking_id=”labradortraininghq-20″ image_class=”ais200fl”] Usar uma caixa é a maneira mais eficaz e simples de acelerar o processo de treinamento doméstico.
Descrição: O método aproveita o fato de os cães terem um instinto natural de não sujar a área onde comem e dormem.
A chave para isso é fazer com que a caixa seja grande o suficiente para ficar em pé, virar-se facilmente e deitar-se esticada, mas não maior.
Um cachorrinho ou cachorro irá então ‘segurá-lo’ o máximo que puder para evitar fazer suas necessidades e então terá que deitar nele.
Um grande benefício para isso é que um filhote aprende, desde muito jovem, que só porque tem vontade de fazer xixi ou cocô, ele não precisa e pode realmente segurá-lo. Com outros métodos, um filhote não aprende esse fato enquanto é tão jovem.
Porém, você não coloca seu cachorro na caixa o tempo todo, isso seria cruel.
Você os coloca na caixa apenas quando não pode observá-los, está ocupado em casa ou talvez longe de casa por um curto período. No resto do tempo, você os observa e regularmente os leva para ir ao banheiro para ensinar-lhes bons hábitos.
Eficácia: Numa escala de 1 a 5, dou nota 5
Digo que é o método mais eficaz que conheço ou sobre o qual já li. Os filhotes aprendem o comportamento correto mais rápido do que com qualquer outra técnica e há menos erros (e menos limpeza!) ao longo do caminho.
Mais adequado para: Todo mundo! Eu recomendo fortemente o uso de uma caixa durante o processo de treinamento doméstico porque é muito eficaz.
Facilidade de uso: Numa escala de 1 a 5, eu diria 3.
É mais fácil do que supervisão constante, mais difícil do que treinamento em papel. Isso ocorre porque você terá que treinar seu filhote na caixa antes de poder usá-la para treinar em casa, o que exige tempo e esforço.
Clique aqui para obter meu guia gratuito e detalhado para treinar seu filhote na caixa.
Equipamento necessário: Uma caixa adequada. Tenho um guia para ajudá-lo a selecionar o tamanho e o tipo corretos que você pode ler clicando aqui.
Mais informações: Para ler uma discussão detalhada sobre o uso de uma caixa para treinamento doméstico, leia:Como usar uma caixa para treinar um filhote em casa
Este artigo aborda por que o método é tão eficaz, como ele aproveita três dos instintos naturais do seu filhote, avalia alguns prós e contras e muito mais.
Supervisão Constante
 © Depositphotos.com / agencyby
 Descrição: É o que parece:você passa todo o tempo com seu cachorrinho, supervisionando-o constantemente.
Cada vez que você percebe os sinais de que eles estão prestes a usar o banheiro, você os pega e leva para o banheiro.
Eficácia: Numa escala de 1 a 5, dou provisoriamente 3.
Na verdade, a pontuação pode ser maior ou menor, dependendo de quão comprometido você está e de quão bem-sucedido você é na supervisão de seu filhote.
Mas dei nota 3 porque, por melhores que sejam suas intenções, por mais atento que você esteja na tarefa de supervisão, você baixará a guarda e seu filhote poderá escapar e cometer erros.
Por esta razão, não é tão eficaz como o treino na caixa e demorará mais tempo, resultando certamente em mais “acidentes” ao longo do caminho.
Mais adequado para: Pessoas que são contra qualquer tipo de confinamento e podem ficar em casa cuidando do cachorrinho o dia todo, todos os dias. Principalmente pessoas que trabalham em casa e aposentados.
Mas este método também faz parte de todo plano de treinamento doméstico, quer você use outros métodos paralelamente ou não. Isso ocorre porque quando um cachorrinho está solto dentro de casa, ele DEVE ser supervisionados de perto para evitar erros.
Facilidade de uso: Numa escala de 1 a 5, dou nota 2.
A pontuação é baixa, pois requer muitas informações de você como proprietário. Você precisa se concentrar em seu filhote o tempo todo, pronto para intervir e corrigi-lo sempre que ele estiver prestes a fazer xixi onde não deveria.
É muito cansativo nunca conseguir tirar os olhos do seu cachorro.
Equipamento necessário: Nenhum. Nada. Nem uma caixa, jornais, almofadas para cachorrinhos ou algo assim. O mais barato de todos os métodos... a menos que você coloque um preço no seu tempo.
Mais informações: For more information on the constant supervision technique, please read the following article:House Training WITHOUT A Crate:Constant Supervision
Umbilical Cord Training
 © Depositphotos.com / andresr
 This is a little used technique, and at first may sound a little silly. But it is highly effective.
Description: This technique calls for you to tether your puppy to you by leash and have them follow you wherever you go when inside your home.
This way they’re never more than a few feet away and have no chance to sneak off unnoticed to potty where they shouldn’t.
You will notice and be able to intervene and correct every possible mistake, taking them outside every time they need to relieve themselves.
Effectiveness: On a scale of 1 to 5, I’d say it’s a 5.
Used correctly, the opportunity for your puppy to make mistakes is completely removed so every single time they need to visit their bathroom spot is a training opportunity you will take advantage of and no mistake goes uncorrected.
Best suited to: People who spend all their time at home with their puppy and would also enjoy literally being tied to their pup all day.
It’s also a good method to throw into the mix for people who’ve found difficulty with ‘constant supervision’ and allow their puppy to sneak off and have accidents in the home, helping them to get better results.
Ease of use: On a scale of 1 to 5, I’d say a 4.
It’s easier than constant supervision as your puppy is attached so you can relax a little in comparison.
It’s easier than using a crate because you don’t have to crate train your puppy. But it’s not as easy as paper training which is very hands off for an owner.
Equipment needed: A quick release collar and a house line / leash.
Further Info: for a detailed discussion of this technique, the benefits, downside, and many more tips, please see my article:Umbilical Cord House Training:What is It? How Does It Work?
What Do I Use And Recommend? A Mix Of 3 Methods
I use and recommend a mixture of crate training, constant supervision and paper training.
I primarily use crate training as I firmly believe it’s the most effective method and I’m also a strong believer in the idea that every dog deserves to be crate trained to enjoy the continuous benefits it offers throughout their life.
I use constant supervision extensively because when a puppy is outside of the crate you have to watch them diligently to avoid puppy mistakes.
I use paper training while my puppies have almost zero bladder control until the age of 10 or 11 weeks, and later in life when I can’t avoid leaving them home alone for longer than they can be expected to hold their bladder.
Admittedly this is somewhat going against my advice because I always recommend to avoid paper training if possible.
It encourages or allows your puppy to toilet inside the home, before then training them not to do so. It’s saying it’s OK, before turning full circle and saying that it’s not.
This is confusing to your puppy and harmful to our house training efforts. (Unless you’re going to have a permanent indoor bathroom spot of course, then this method is perfect.)
But even though I recommend against it, using paper training ever so occasionally as a fall back plan works well for me.
I explain more fully why and when I use paper training in later sections of this article on ‘House Training For Full Time Workers ‘, and ‘A Note On Puppies Between 8 And 12 Weeks '
Eliminating On Command
 © Depositphotos.com / andresr
 Though not essential, it’s extremely useful to train your dog to eliminate on command.
When you’re in a hurry and need to leave in the morning, or it’s right before bed time, these are times you will wish your dog would eliminate on command rather than you having to patiently wait for them to do their job.
Most dogs love being outside and will use any excuse to get out there and stay there.
So it’s of benefit if you can clearly tell them you’re going outside to toilet only and for nothing else, that there’s no chance of exercise or play. If they don’t potty, they’re coming straight back in.
You do this by using a cue word and walking them on leash to their potty spot, not allowing them to do anything else and if they do not potty, taking them back inside and trying again in a few minutes.
Because a full bladder or bowel is uncomfortable, dogs are happy to relieve themselves, but some may try to hold it if they think they can get to stay outside and sniff around a while.
By not allowing this and associating it with a consistent command, it will only take a few short weeks for them to learn your chosen command means a bathroom break only and that if they don’t go, they’re coming straight back inside uncomfortably full.
Choose Commands That Everybody Must Use Consistently
If this is something you’d like to train, it’s important that you choose the words to use before you start the training and make sure everybody uses the same words consistently.
If people use different words, your dog will get confused.
So pick a command like ‘toilet time ‘ that you will only use when you’re taking them to the bathroom and you will not allow them to do anything else.
You’ll have a different word like ‘walkies ‘ for other more fun times outside and your dog will eventually learn the difference and set their expectations of their time outside accordingly.
Once outside you can use another command like ‘potty’ or ‘do your job’ to ask them to do their business.
For the first weeks you should wait for them to start doing their business and then use the word ‘potty’ to build an association. And praise them afterwards with ‘good potty’. This will slowly teach them the command.
Eventually your dog will learn ‘toilet time’ means a quick bathroom break only, and ‘potty’ is you asking them to go.
NOTE: For a very good guide on training to eliminate on command from the ‘Whole Dog Journal’, please click here.
A quick word of caution: Don’t use a word for your elimination command that gets used at other times. For instance, many people use the words ‘hurry up!’, but if you say this to your spouse when heading late out the door, this could get very messy if your dog hears and reacts.
Getting Your Puppy Used To A Collar And Leash
When your puppy’s very young it’s easy enough for you to scoop them up and carry them to their bathroom spot. And this is fine for the first couple of weeks while they have no bladder control and will perform their business very quickly.
But once they start to learn some bladder control, if you take them to potty without them being on leash, as soon as they hit the outside there’s all the sights, sounds and smells that can take over their inquisitive minds.
They easily forget what they’ve gone outside for and will romp and play in your yard instead, before going back inside still full. And some dogs even learn to actively hold their bladder just so they can stay outside to explore for longer.
So it’s in your best interests to lead them on leash to their bathroom spot and keep them there until they complete the job in hand.
Before you can do this you need to first get your puppy used to wearing a collar and leash. To help with this I’ve written a detailed guide that you can read by clicking here:How To Get Your Puppy Used To A Collar And Leash
Start this process at 10 weeks, and always lead them on leash from the 11th or 12th week. You may regret it with lots of time waiting outside if you don’t!
Have You Got Everything Prepared? A Check-list Before You Start
Like everything in life, house training runs smoother if you have everything ready before you start, hopefully before you even bring your puppy home. Although it’s never too late of course!
To help make sure you’re ready, here’s a checklist to cross off and make sure you have everything prepared. Have you:
- Decided on and marked out a suitable bathroom spot?
- Chosen and purchased a suitable high-quality nutritious food?
- Figured out the times of day you will feed your puppy?
- Got a collar and leash? Put in place a leash training plan?
- Bought a suitable crate and set it up in a suitable place?
- Bought bedding for the crate?
- Bought chew toys to occupy your puppy in the crate?
- Decided on the commands you will use if any?
- Purchased either baby gates, a pet barrier or an exercise pen for longer term confinement?
- Sourced stacks of newspapers or puppy pads to use in the long-term confinement area?
- Bought a tarpaulin sheet to protect the floor under the crate or exercise pen if it isn’t tiled or linoleum?
- Bought some small but highly tasty training treats to use as a reward?
- Bought specialized pet stain removing and odor neutralizing cleaning products?
- Bought a UV light to find hidden spots of urine that must be removed to prevent repeat accidents?
- Sat and discussed with every member of your household your finalized plans so everybody has the same info?
With all this ready and in place, you’re now ready to begin house training your puppy.
Successful House Training Is All About Schedules And Routine
Dogs thrive when living to schedules and routine, doing best when they have set times for eating, going to toilet, exercise, training and play.
And when it comes to house training, you’re going to love schedules and routine too!
Feed On A Schedule, Your Puppy Will Eliminate On A Schedule
If you feed your puppy at random times throughout the day, they’ll need to defecate at random times throughout the day.
They won’t fall into any predictable schedule and your life will be that much harder.
But because the passage of food through their digestive system stays roughly the same, if you feed your puppy at the same times every day they will need to defecate at roughly the same times every day.
Furthermore, because puppy’s learn through repetition, by taking yours out to potty at the same times every day, their body learns to expect and follow this schedule, training your puppy to toilet at the times you’d like them to.
When you know the times your puppy needs to eliminate you can have them at the right spot at the right time with a far greater success rate than if you didn’t follow a routine.
This results in fewer mistakes, more opportunities to praise your puppy for going in the right place and so speeds up their learning.
Can You Predict When They Need To Potty?
Depending on their age a puppy will need to poop 3 to 6 times a day, and wee many more times than that. Can these times be predicted? Mostly they can.
When a puppy needs to potty depends on when they last ate, drank and their recent activities. Mostly they need to go:
- First thing in the morning
- The instant they wake up from a nap at any time of the day
- Just before going to bed
- Within a few minutes of eating or drinking
- Immediately after a play session
- Immediately after any excitement
But a puppy also needs to go many times per day regardless of recent activities, so you should also take your puppy to their bathroom spot on a consistent schedule such as the following:
- At 8 weeks old – every 30 mins.
- At 10 weeks old – every 45 mins.
- At 12 weeks old – every 1 to 1. 1/4 hours.
- At 16 weeks old – every 2 hours.
- At 20 weeks old – every 3 hours.
This is only a guideline because all puppy’s are different. And on that note…
Needs Vary – Create A Schedule To Match Your Individual Puppy
Not all puppies are the same. Some will need to wee within 2 minutes of drinking, others after 20 minutes. Some will need a bathroom break within 2 minutes of waking, others 15 minutes later.
This means there isn’t a ‘one-size-fits-all’ schedule I can give that’s suitable for every puppy and owner. You have to determine your puppies own natural tendencies and create a schedule to suit.
To achieve this, you need to follow this 5 step process:
- Feed them to a strict schedule.
- Decide on exercise, play and training times.
- Develop a schedule including feeding, exercise, play, training and all scheduled potty times.
- Alongside your schedule, keep a written diary of your puppy’s daily activities, bladder and bowel movements.
- Use the information gathered in your diary to learn from any mistakes and adjust your schedule for the following week.
This may sound like a lot of work but it really isn’t once you get in to the routine. And besides:
Once you’ve determined your puppy’s natural rhythms, you can be at the bathroom spot at the correct times more accurately which is of huge benefit to both you and your puppy, so it’s highly worth doing!
But if you fear living to strict schedules is too hard to do…don’t fear! You don’t have to stick to them 100% of the time.
The more you can stick to schedules and routines, the smoother and faster the process will be. But you can stray from the path when necessary and still find success, it will just take a little longer.
Just don’t be overly strict and hard on yourself because we all have a life to live outside of house training!
So let’s go through the 5 steps of creating your puppy’s schedule.
Creating A House Training Schedule For Your Puppy
 © Depositphotos.com / zzve
 Follow this 5-step process to create a schedule that works with your puppy’s natural rhythms and fits with your lifestyle and commitments.
Keeping and following a written schedule may seem odd or a bit excessive, I’m sure you’ve not seen many people bother with it?
But I promise you it’s not much work, after a couple of days practice it becomes a simple routine, the time it takes is negligible and the results are phenomenal.
Step 1:Decide Your Puppy’s Feeding Schedule
Depending on how old they are, your puppy needs feeding between 2 and 4 times a day. Here’s a guide to how often and when you should feed them:
You should feed your puppy 4 times a day until 12 weeks old.
To achieve this you need to feed them every 4 hours and you should make it the same time every day, fitting it into a schedule that’s best for you.
A good routine would be to feed ‘breakfast’ when you first get up, at 7:30AM, then at 11:30AM, 3:30PM and 7:30PM.
You should feed your puppy 3 times a day when 12 to 26 weeks old.
The timings for 3 feeds a day would be roughly every 6 hours:7:30AM, 1:30PM and 7:30PM.
From 26 weeks old and onwards, feed your puppy just two times a day
For 2 meals a day you need to space them out 8 to 12 hours apart.
What works for me is shortly after I get up at 7:30 and when we have our evening meal between 6:15PM and 6:45PM.
Availability Of Water:
You should make sure fresh water is always available but because drinking too much or too little can be a sign of health problems, you do need to monitor their water intake.
Step 2:Decide a Schedule For Exercise, Training And Play
© Depositphotos.com / Madrabothair Physical activity has a direct influence on a puppy’s potty schedule because it ‘helps things move along’ for want of a better expression.
Physical activity often leads to a puppy needing to potty very soon after. So to encourage predictable potty times for your puppy, you want to schedule their exercise and play.
This will help your puppy’s mind and body to slip into a routine that will help you both with the house training process.
Deciding when to exercise, train and play with your puppy is entirely up to you. You should fit it around your lifestyle and commitments, but try to make it the same times each day if you can.
Step 3:Design Your Schedule From The Info Gathered
If you’ve followed the guide so far, you’ve now gathered all the information you need to design your puppy’s house training schedule.
Enter all the following details into a single column in an excel spreadsheet, or write them down as a day schedule with a pen and paper:
- When you wake and add an instant bathroom break (before you do ANYTHING for yourself!)
- Enter your puppy’s feeding times.
- Enter the times you will play with, train and exercise your puppy.
- Enter a scheduled visit to the bathroom spot after each of the activities listed in points 1 to 3.
- Add scheduled bathroom visits after any length of time longer than your puppy should be expected to hold it according to their age. (30 mins at 8 weeks, 45mins at 10w, 1hr at 12w, 2hrs at 16w, 3hrs at 20w+).
- Write in scheduled sleeps for your puppy, place them in the crate or confinement area.
- All other time is SUPERVISED free time, spent socializing, relaxing and bonding with the family and so on.
After writing down this schedule, tick off each task as you go through the day with your puppy.
This way you will always know what needs to be done and when, and there will be no confusion about whether someone else in the house fed, exercised or took the puppy to the loo.
If it’s not crossed off the schedule, it hasn’t been done.
Step 4:Keep A Diary Of Your Puppy’s Daily Activities
 © Depositphotos.com / Gajus-Images
 Alongside the schedule you’ve designed, add some columns where you can take notes of your puppy’s bladder and bowel movements, as well as their daily activities.
You do this because it’s important information you can use to design an ever more accurate schedule going forward. (I discuss this further in step 5 below.)
The things you should write in your diary are:
- Any unscheduled play or other excitement (Puppies often need to wee after)
- The times they sleep
- The times you take them to their bathroom spot
- The times they urinate
- The times they defecate
- How long they took to potty after being taken to the potty spot
- Toilet visits where puppy neither peed or pooped
- Any accidents / house training mistakes and why they happened
Basically, note down anything food, activity, accident or potty related so you can look for patterns to help you in the next step.
Step 5:Learn From The Diary To Refine Your Schedule
Look over any ‘accidents’ your puppy had and you noted during the day.
You should be able to pick up on any patterns and adjust your own behavior to avoid mistakes in future.
Was puppy left alone and peed in the living room while you made breakfast? – You need to increase supervision or make doubly sure you crate them when you’re busy.
Puppy should never be left alone unsupervised, learn from this mistake.
Or maybe puppy peed in the crate after an hour? – You left them crated longer than they can hold their bladder, or didn’t empty them before crating.
Learn from this mistake.
Look over how long they took to potty after being taken for a scheduled potty break
Did you catch them ‘in the act’ 3 times in a single day? Well done for watching them closely enough.
However, if they tried to go 3 times in the home, you’ve learnt that you likely aren’t taking them to empty themselves often enough. So increase the frequency.
Or perhaps the opposite happened and you noted that 3 times in the day you took puppy for a scheduled bathroom break, they didn’t go and you returned them inside for 15 minutes before trying again?
This shows your puppy is maturing fast, doesn’t have to potty as often as you thought and can last longer between potty visits than you’re allowing.
Therefore you should stretch out the time between visits by 10 to 15 minutes for the following day.
Look over how long after eating they pooped
If you see puppy didn’t potty for 20, 15, 20 and 20 minutes after their meals of the day, with this information you learn it’s pointless to take them to their potty spot until 15 minutes after they finish eating.
Some puppy’s go 2 minutes after eating, some after half an hour. This is how you find out.
And Now House Training is So Much Easier
By writing out the schedule as in step 3, you should never forget to feed, train or take your puppy to potty. If it’s not marked off on the schedule, it’s not been done.
And by using the schedule as a diary as in step 5, you get feedback on how you and your puppy are performing, and are armed with the necessary info to make changes to your schedule over time.
This helps you to truly match your puppy’s natural rhythms and their maturing and changing body.
You, your puppy and their needs all stay in sync and house training becomes that much easier.
How And Where To Keep The Diary
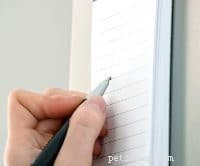
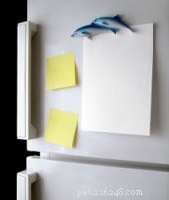 © Depositphotos.com / ccaetano
 For ease of use, I recommend simply keeping a written diary with good old-fashioned pen and paper.
We’re all in the electronic age surrounded by smart phones and i-Pads, but this is simply too much hassle and will likely lead to you not bothering if you have to power up a device and so on to make an entry.
Just make a spreadsheet in excel and print it out, or simply buy some lined paper.
Keep it somewhere you can always see and know where it is, alongside a pen or pencil and write entries in it as you watch your puppy throughout the day.
Next to your house phone, pinned to the fridge or by the exit to your puppy’s bathroom spot is a good place to keep it, but put it wherever is best for you.
When To Start And Stop Using A Schedule And Diary?
When you first get your puppy home at 8 weeks, they can barely control their bodily functions so keeping a diary isn’t perhaps that helpful but I still recommend you do so, to get yourself into the habit.
I would recommend keeping a diary every single day until you’ve determined a definite pattern and have spotted their individual ways. Up until they’re 14 weeks old is a good target.
After this, continuing with a diary every day is the best advice, although keeping one for 3 consecutive days each week will be sufficient for you to pick up on any changes as they mature.
Once your puppy is 5 to 6 months old, they will have sufficient bladder control and experience to make a schedule and diary unnecessary.
Just make sure they get access to the outside at least once every 3 hours and all will be fine.
Extending The Time Between Toilet Breaks
I discussed earlier how a puppy will need regular visits to their bathroom spot, something like every 30 minutes at 8 weeks old, every 45 minutes at 10 weeks old and so on.
But every puppy is different and their progress in having longer time between needed toilet breaks will vary too.
Although your puppy’s natural progression reflects in your diary and your schedule will adjust to suit, you should purposely try to increase the time between breaks yourself if it doesn’t happen naturally.
If you don’t see a natural increase of time between eliminations, add 5 minutes to the scheduled times every 3 or 4 days to stretch out how long they can last.
If they can’t make the time, peg it back 5 minutes and try to increase the time again in a further 3 or 4 days.
You do this because as a puppy grows, the size of their bowel and bladder increases, so they will be able to hold more for longer and you want to take advantage of this.
This is also teaching them necessary bladder and bowel control.
Your aim is to have them needing a toilet break only every 4 hours or so by the time they’re 5 to 6 months old.
Taking Your Puppy To The Bathroom Spot
In an ideal world, when you take your puppy to potty they will empty themselves completely and instantly, with no delay and not holding any back to release as soon as they’re back in your home.
There are a few things you can do and some that you certainly shouldn’t that will help you to achieve this goal.
Use your cue word before you take them: By using your chosen cue word every time before you take them to potty, your puppy will learn what the trip is about and what they must do. This eventually leads to faster results as they know what is expected of them.
Lead your puppy to the bathroom spot on leash: This gives you the ability to keep your puppy at the bathroom spot and prevent them wandering off, getting distracted and forgetting what they are there for.
This isn’t always possible if you catch them in the act and must hurry, but for scheduled bathroom visits you should always aim to take them on leash.
Make sure you stay with them at their bathroom spot: If you have them on leash, then of course you will be. But if you don’t have them on leash, make sure you stay with them because the separation will just make your puppy anxious to get back with you and they will not potty.
Once at the bathroom spot, don’t say or do anything until they start to eliminate: Puppy’s get distracted very easily and any attention can take their mind off the job in hand. Be boring, uninteresting, and just hold your puppy’s leash until they start to go.
When they start to go, say your chosen cue word in a soft warm voice. Otherwise remain silently still until they’re finished: You need to associate your cue word with the act, but if you say it too loud and brightly, it may distract them and they won’t finish.
Similarly, any other movement or sounds like praising them too early or shuffling your feet might distract them and they might not finish what they’ve started.
If they don’t finish and completely empty themselves, they may finish inside your home and even if they don’t they will not be able to make it to the next scheduled bathroom break so an accident in the home is more likely.
When you’re sure they’ve finished, praise them like mad and reward them: You should heartily praise your puppy for going in the right place, then allow them a few minutes off leash, a couple of minutes play or a tiny (and I mean tiny!) but tasty food treat.
The praise and reward make going to potty a happy experience, tells them they’ve done right and helps them to learn more quickly.
Mix up the reward between play, time off leash and a food reward to keep them guessing, but keep the food rewards to a minimum as what goes in must come out and random feeding promotes random elimination times!
If Your Puppy Doesn’t ‘Go’ When At Their Bathroom Spot
 © Depositphotos.com / c-foto
 First of all, make sure you’ve spent enough time out there.
Many people pop out, stand for 1 minute and then come back in. This isn’t enough as a puppy can only go when they need to go and they may not be ready.
Some people recommend to stay out there for 10, 15, 20 minutes, whatever it takes until they go, then praise profusely when they do. Although this advice may be sound, personally I’d rather not.
I recommend you give them 3 to 5 minutes, saying your cue word every 30 seconds or so but otherwise standing silently still just holding their leash so they cannot wander off.
If after 3 to 5 minutes they haven’t been to toilet, bring them back inside your home and then:
If using constant supervision: Set them down in your home and continue watching them to intervene in case they make moves to go in the wrong place. Take them back to their bathroom spot in 10 minutes or so.
If using a crate for house training: Pop them back in the crate and leave them for 10 minutes. Then take them back to their bathroom spot.
If using umbilical cord training: Take them back into your home and watch your puppy carefully while they’re tethered to you by leash. Take them to their bathroom spot after 10 minutes.
If paper training: If they are confined to the area that’s papered, do nothing. If not, take them away from their bathroom spot and watch them for 10 minutes before returning them to their bathroom spot.
In all cases, just remember you’ve brought them back in with a full bladder so you mustn’t take your eye off them if free in your home.
And if crate training, do not leave them in the crate too long else they may be forced to soil in there. Prevent this at all costs.
Rinse and repeat the visits to and fro like this until they do potty, then follow the next sections advice.
What You Should Do Between Scheduled Bathroom Breaks
Between scheduled bathroom visits you should do two things:Allow some supervised free time in your home, and use your chosen house training method.
Granting Free Time In Your Home
 © Depositphotos.com / ikostudio
 After returning from the bathroom spot you should grant your puppy some free time in the room where you spend most of your time, up until 20 to 25 minutes before their next scheduled bathroom visit.
By free time I mean time outside of their crate, or off leash, or out of their confinement area. Time free to roam, explore and live life.
When 10 weeks old they may need to toilet every 30 minutes, so they only get 5 to 10 minutes free time. When 12 weeks old, they may need to toilet every hour so they can get 35 to 40 minutes free time.
You allow this free time because you are of course working toward a time when they will always be free and trusted unsupervised.
To get there they need the experience, to get used to being free in your home and begin seeing it as a place they need to keep clean.
They also need social interaction and life experiences.
The best time to grant this free time is right after a bathroom visit so you’re fairly sure they’re empty and are far less likely to make a toilet mistake in your home.
The important thing to remember is:
When your puppy is free in your home in this way, you must know exactly where they are at all times and be watching them like a hawk, ready to intervene if they look like they’re about to potty where they shouldn’t.
But what are the signs a puppy is about to potty?
Signs To Look Out For Showing Your Puppy Is About To Potty
When supervising your puppy’s free time, the signs you need to look out for that they need to eliminate are:
- Sniffing
- Pacing about and / or circling
- Whining and / or barking
- General restlessness
- Heading to a secluded, hidden spot or trying to leave the room.
- Heading toward, barking at or scratching the door to the outside.
- Appearing needy, or getting very nippy and naughty (if it’s out of character.)
The minute you see any of these signs you should take your puppy to their bathroom spot immediately. There may well be some false alarms, but better safe than sorry.
Most puppies will display one or more of these pre-elimination behaviors, but no two puppies are the same so you need to be observant and learn your own puppy’s pre-toilet rituals.
Carefully watch them and you should soon notice what body language means a wee or a poop is imminent. There will be recognizable signs.
End Free Time 20 Minutes Before A Scheduled potty Break
 © Depositphotos.com / AOosthuizen
 Once your puppy has enjoyed some free time and it’s nearing 20 to 25 minutes before a scheduled potty visit, you need to switch to using your chosen house training method.
We do this because the time is fast approaching when mistakes are most likely to be made. So we might crate our puppy, or attach a leash for umbilical cord training if we’re using these techniques.
Remember, all free time is closely supervised anyway so you’re ready to react if they’re about to ‘make a mistake’, So..
If using constant supervision: Carry on as you are. Watch your puppy and be ready to react if they look like they’re about to potty. Then at their scheduled potty time, attach a leash and lead them to their bathroom spot.
If using a crate for house training: Encourage your puppy into their crate and close the door, leaving them there until their scheduled potty time and then release them, instantly attaching a leash and leading them to their bathroom spot.
If using umbilical cord training: Attach a leash and tether your puppy to you, ready to react if they make moves to eliminate. Take them to their bathroom spot at the scheduled time.
If paper training: Take your puppy to their confinement area where their papered bathroom spot is and supervise them, ready to intervene if they make moves to potty away from the paper. Encourage them to potty at their scheduled time if they don’t do so naturally.
If You Catch Your Puppy In The Act Of Making A Mistake
If you catch your puppy pottying in the wrong spot, you should simply clap your hands and say a firm ‘NO!’. You don’t want to shock and scare them, just loud enough to startle and get their attention.
It’s very important you DO NOT scare them as they may become afraid to potty in front of you. Not good when you need to be there to encourage them for doing it in the right place.
When you clap and say ‘NO!’, some puppies will stop what they’re doing, but others may not.
If they do, you can pick them up and carry them, or take them by the collar and gently lead them to their bathroom spot, then encourage them to finish where they should.
But if your puppy doesn’t stop mid-flow, my advice is to accept the fact you’re too late, you didn’t recognize the signs they needed to potty (or weren’t watching them closely enough) and you should let them finish and then clean it up.
Many people recommend to pick your puppy up and take them outside even if they don’t stop. But to me this seems foolish.
Instead of a little pile or puddle, you then have a long line of wee or poop from where you caught them all the way to the bathroom spot that you then have to deep clean instead. To me this isn’t worth the extra cleaning effort.
If You Find A ‘Mess’ But Didn’t Catch Your Puppy In The Act
 © Depositphotos.com / adogslifephoto
 There is nothing you can do.
You’ve missed the opportunity to correct your puppy and anything you do now your puppy will be unable to connect to the act of pottying in the wrong place.
If you get angry, shout at or punish them in any way, they might ‘look guilty’ trying to appease you, but they will have no idea what it is that’s driven you mad. They’re just trying to calm the situation.
And what sometimes happens is a puppy learns that poo on the floor is what you’re mad about, causing them to slink away to poo where it’s hidden, or worse they may even eat it so you don’t see it and get mad.
So if you stumble on a mess you didn’t catch them make, simply move them away and deep clean the area.
Then think how they were able to make such a mistake and tweak your plans so it cannot happen again. But any corrections or punishment now will be futile.
House Training For Full Time Workers
This advice applies not just to full-time workers, but also if you must occasionally leave your puppy home alone for a few hours.
Most importantly, follow all the advice in this guide so far for the times that you are home.
Supervise them, correct any mistakes, set feeding and elimination schedules and everything else I have advised. Then, what follows are your choices of what you can do to cover when you aren’t at home.
First of all, if like me you use a crate, you simply cannot leave your puppy in the crate for many hours. They’ll be forced to potty in there after a very uncomfortable time trying to hold it for as long as they possibly can.
This is very unfair on your puppy and it will destroy the crates power as a house training tool if they lose the instinct to keep it clean.
Secondly, please do your best to enlist the help of a family member, friend, neighbor or hire a dog walker to periodically pop in to visit your puppy, take them to their bathroom spot, give them some social interaction and so on.
I understand this isn’t possible for all owners, but you should strive to achieve this if possible.
Having said that, what should you do about house training when you aren’t at home:
Confine Your Puppy And Use Paper training
Throughout the many articles of this guide you will have read me advising against paper training unless you’re planning on a permanent indoor bathroom spot for your dog.
But I also freely admit to using paper training myself occasionally, for the unavoidable times I have to leave my puppy home alone for a few hours.
If you have to leave your puppy home alone for any reason, usually because you work, then paper training in your absence is the only thing you can do.
You then have two options available to you:Buy and use an exercise pen, or confine your puppy to a single, puppy-proofed room.
Using An Exercise Pen
[amazon fields=”B003XU0B62″ value=”thumb” image_size=”large” tracking_id=”labradortraininghq-20″ image_class=”ais200fr”] An exercise pen is a confinement device that looks like a crate but is much larger and has no roof. They can have any number of panels, be square, hexagonal, octagonal, L-shaped…they’re very flexible (an example 8 sided pen is in the image to the right.)
You use it to confine your puppy so you know they’re safe, as is your home and belongings from their teeth.
They’re big enough for you to paper an area inside to use as a toilet, while leaving space where you can set up your dogs bed, a water bowl and some chew toys and so on away from where they have to potty.
Initially use less than half of the confinement area for your puppy’s bedding, toys and water bowl, then paper over the remaining floor space.
As they get used to pottying on paper, reduce the area covered one sheet at a time until just a small area remains covered.
Once you know your puppy can hold their bladder for longer than they have to be left alone, remove the paper altogether.
By 16 to 20 weeks, they should be able to last the 3 or 4 hours max they will be left alone and somebody comes to exercise them and allow a bathroom break.
NOTE: You should get your puppy used to an exercise pen by using the same techniques as crate training, so please refer to my guide to crate training puppies
Using A Single Puppy-Proofed Room
[amazon fields=”B004RL1KPC” value=”thumb” image_size=”large” tracking_id=”labradortraininghq-20″ image_class=”ais200fl”] When I’ve had to leave a puppy alone, I confine them to a paper covered area of a puppy proofed room, with a puppy pad in a holder.
Between 8 and 12 weeks (when weeing seems spontaneous), my puppy spends a fair bit of time in there and I paper train them to use puppy pads.
Most recently, the room I used was basically our dining room, though it’s never used for that purpose and is essentially bare.
Our kitchen and dining room was separated by an arch where a door used to be, with tiled flooring, making it ideal.
I used a baby gate across the arch between the kitchen and dining room, and initially covered the dining area with paper, over time reducing it to just two sheets with the puppy pad holder on top.
The dining area is completely empty, with no furniture, nothing in there. So it’s as puppy proofed as can be. But a word of warning…
If you use this option and have any furniture or anything at all in the room, it’s likely it will be scratched and chewed! Skirting boards, the corners of furniture items, anything within reach is a potential target for teeth and claws.
My girlfriend works from home, we crate trained and we had no problem finding house sitters in an evening if we needed one, so we all but had things covered. But this is something you need to be mindful of.
So I recommend using an exercise pen if you’re going to leave your puppy alone often and there’s any chance of a room being damaged.
Some Form of Confinement is Always Necessary
 © Depositphotos.com / feedough
 Regardless of the method of house training you choose, some form of confinement is almost always necessary, for the times when you really cannot watch your puppy.
And there will always be a time or two so it’s best to prepare in advance.
You may have an unexpected visitor or need to visit A&E in an emergency. Whatever the reason, there just WILL be times you cannot supervise your puppy.
If you’re using a crate, you have these times covered.
But if you’re against a crate for whatever reason and have chosen to exclusively use constant supervision or umbilical cord training, you will have to invest in an exercise pen or confine your puppy to a single room and use paper training.
The essence of house training is to prevent mistakes and praise your puppy heavily when they potty in the right place.
If you cannot watch your puppy, the chances of them making a mistake go through the roof.
So even if you choose to use a constant supervision method exclusively, you will still need to confine your puppy sometimes to a paper covered area just in case.
A Note On Puppies Between 8 And 12 Weeks
 © Depositphotos.com / domako
 You’ll likely find your 8 week old puppy has absolutely no bladder control. I mean literally none at all.
One minute they are trotting along, the next they are leaking. No warning signs for you, not even any warning signs for them. They just don’t know it’s going to happen themselves.
It’s not their fault, it’s just their immature bodies doing what they do.
During this time it’s foolish to allow them on your living room carpets for even a second.
I recommend setting up an exercise pen with the entire area papered, or do as I do and confine them to a room with the entire area papered.
Use this time to paper train them, to get them used to weeing on paper and gradually reduce the area because you will use this method if you ever have to leave them home alone during the next 4 or 5 months.
Some time between 8 and 12 weeks, your puppy will start to show some bladder control (usually 9 to 10 weeks) and will begin to show warning signs that they’re about to potty instead of instantaneously leaking. They will sniff, circle and so on as I mentioned before.
At this point you can now move on to using your chosen house training method.
I’m not saying when 8 weeks old you don’t house train them. Do! Start encouraging them to potty in the right place from the minute you get them home.
I’m just saying that it’s very hard when you have absolutely no warning for the first few days to a couple of weeks. Just don’t get mad at your puppy, it isn’t their fault and you should expect this.
House Training A Puppy At Night
A young puppy will not be able to last through the night without needing to potty. However, similar to humans a dog’s body slows down during the night and the need to toilet is severely reduced.
So the good news is, even at 8 weeks they will be able to last 4 or so hours and you will only need to wake once during the night.
A Schedule For Over Night

Allow your puppy no food for 3 hours and no water for 2 hours before bed. Also, make sure to take them to their bathroom spot right before you go to bed so they can empty themselves.
Then set an alarm for 4 hours after their bed time when you must get up and take them to their bathroom spot. No excuses, you simply must do this.
If you find your puppy has soiled in this time, you should set the alarm for half an hour earlier the next night (3.5 hours). Repeat until you find you’re waking before they’ve had an accident.
After a few days of not having a night-time accident, set your alarm for 15 minutes later and increase the time by 15 minutes for each successful night they do not have an accident.
The time a puppy can last over night without needing to potty increases dramatically during their first few weeks so you’ll find this is OK to do.
If you find they make a mistake one night before you wake, set the alarm back half an hour, make sure they stay dry a few days and then increase 15 minutes nightly again.
Within a few short weeks you’ll find they can last a full 7 hours without needing a bathroom break.
And by using this schedule, you strike a good balance between a couple of inevitable accidents while stretching out the time at a good pace to lasting a full night.
A Word Of Caution For Those Using A Crate
It’s important that your puppy isn’t forced to eliminate in their crate as it can ruin their natural instinct to keep it clean, the very thing we take advantage of to help the house training process.
This is why I recommend if you find a mess you set the alarm for half an hour earlier, a reasonably big step back to where they’ve been successful at before.
If they soil their crate more than once in any given week, you may have to progress slower (add 15 minutes every 2 or 3 days), or perhaps sleep them in a papered exercise pen or their confinement room.
Maintaining their instinct to keep the crate clean is of utmost importance.
You should also consider consulting your vet to make sure it’s not a medical problem causing the mistakes.
What To Do At The Bathroom Spot At Night
When you take them out at night, say your chosen cue word, take them straight to their bathroom spot, praise them gently when they finish their business but do not reward them with anything else.
The last thing you want is to teach your puppy that during the night is a time for play or food treats!
This will come back to haunt you in a big way and result in noisy sleepless nights. You want your puppy to learn that night-time is for sleeping and for nothing else.
When the alarm goes off, collect them, take them to potty, praise with a simple, deadpan ‘Good potty! ‘ then silently take them back and return to sleep until the morning. Do nothing else.
By 16 Weeks Old They Should Last Through The Night
No two puppies are the same. Some will be able to last the whole night without a potty break at 10 weeks (rarely), and some may not be able to at 15 weeks (also rarely).
But certainly by 16 weeks old your puppy will be able to last a 7 hour night without needing to potty if you do not feed them for 3 hours or provide water for 2 hours before bed time and allow them to empty themselves right before you lay down for the night.
No Progress? It Could Be Due To Medical Issues
 © Depositphotos.com / Nivens
 If you seem to be making little progress and your puppy is weeing and pooping randomly all the time, or just doesn’t seem to be developing bladder control, it could be due to medical reasons.
If you are feeding, exercising, training and playing with your puppy to a schedule, and when you look at your diary there seems to be no pattern to the times they need to potty, you should seek the advice of your vet.
Common ailments such as gastroenteritis, urinary tract infection and health issues affecting internal organs and the genitalia can lead to a dog needing to potty much more frequently, often leading to eliminating in the house.
Also, you should regularly check the firmness and consistency of their stools and if they’re too hard and dry, or soft and runny, there’s likely something wrong with their diet or a medical condition to blame. Again, seek the advice of your family vet.
You cannot successfully house train a puppy who is ill because their bodily functions will be too unpredictable. But of course if they’re ill, you want to have them back to good health anyway!
How Do You Know When It’s Time To Stop House Training?
The simple answer is:‘When your puppy’s proven that they know to never soil inside your home.’
The average will be between 6 and 7 months old. The élite few may be some weeks earlier and yet others, particularly the smaller breeds, may take from 8 to 10 months. But 6 to 7 months is the ball park figure to aim for.
However, you have to be careful here and can’t judge it by a clock or calendar, you have to judge it by your puppy’s behavior and only stop when they have proven you can trust them.
A single mistake in the home can cause a major setback.
A puppy may not make a mistake for 2 weeks, then you give them too much freedom, they make a mistake and all of a sudden they are regularly trying to potty in the home again.
Also, some puppies just seem to forget everything for a few days now and then while growing up, even after being perfect for a couple of weeks.
Please remember this, expect it even, because it’s perfectly normal and you shouldn’t get worried or think your dog is being naughty. Just stick to your plan and they WILL eventually get it.
So anyway, it’s in your best interests to show caution and not be too hasty to end the house training process.
My advice would be to continue until they haven’t even attempted to make a mistake for at least 6 weeks so you can be sure they really have ‘got it ‘.
Conclusão
With house training, the fewer mistakes you allow your puppy to make and the more they are rewarded for doing the right thing, the quicker they will learn and the faster you will find success.
Because of this, the more effort you put in and the more time you spend with your puppy at the beginning – supervising to correct mistakes and taking them to their bathroom spot many times each day – the better.
But there are many other things you can do to help yourself and your puppy to find success. Setting up routines and schedules, controlling your puppy’s diet, understanding your puppy’s capabilities at different ages, working with their natural instincts and more besides.
This guide has provided you with all the theory, strategies, tips and tricks you will ever need to successfully house train your puppy as quickly and efficiently as possible, with the fewest mistakes along the way.
Put into practice what you’ve read within this guide and with a little patience and dedication you will be able to turn any puppy into a house training champion.
Meu Programa Completo de Treinamento em Casa
This was part 11 in a 12-part series where I’ve tried to provide all the guidance you could possibly ever need and covered everything I can think of for you to successfully house train your puppy or adult dog.
Por favor, veja toda a série vinculada abaixo:
- Parte 1:Treinamento doméstico – o guia definitivo
- Parte 2:Necessidade básica de saber os fatos antes de começar
- Parte 3:A mentalidade e a abordagem que você deve adotar
- Parte 4:Produtos, suprimentos e equipamentos de treinamento doméstico que você precisará
- Parte 5:Acidentes acontecem:como remover manchas e odores de animais de estimação
- Parte 6:As escolhas alimentares fazem uma grande diferença
- Parte 7:Como usar uma caixa para treinar um cachorrinho em casa
- Parte 8:Treinamento Doméstico SEM Caixa:Supervisão Constante
- Parte 9:Como treinar seu filhote ou cachorro com papel da maneira mais fácil
- Parte 10:Treinamento na Casa do Cordão Umbilical:O que é? Como funciona?
- Parte 11:Como treinar um cachorrinho em casa
- Parte 12:Como treinar um cão adulto em casa – e como resolver problemas comuns
Questions, Feedback And Comments?
This guide has taken me many weeks to put together so I’m hoping it will prove useful to people.
I would love to hear any feedback you have whether good or bad, so I can improve the guide over time and make sure it’s as useful as can be.
If you have any feedback, comments, questions or suggestions on how to house train a puppy, please add them to the comment section below and I will answer every one. Thank you :-)
Further Reading:
For an entire website dedicated to House Training:www.TheHouseBreakingBible.com
For many example schedules for puppies of different ages, see:Housetraining from ‘The Academy’, Canada.
For a nice, detailed guide with some further tips and advice, see:How To Potty Train A Puppy, from ‘Fido Savvy’
Save to Pinterest
Principais escolhas para nossos cães
- MELHOR BRINQUEDO PARA CACHORRO
Nós gostamos:Calmeroos Puppy Toy com batimentos cardíacos e pacotes de calor – perfeito para novos cachorrinhos. Ajuda a aliviar a ansiedade na nova casa. - MELHOR MASTIGAÇÃO DE CÃO
Nós gostamos de:Bones &Chews Bully Sticks - Todos os nossos filhotes adoram morder, beliscar e mastigar. Adoramos usar Bully Sticks para ajudar a desviar esses comportamentos indesejados. - MELHORES TRATAMENTOS PARA CÃES
Nós gostamos:Crazy Dog Train Me Treats – Uma de nossas guloseimas favoritas para treinar nossos filhotes de cães de serviço. - MELHOR COMIDA FRESCA PARA CÃES
Nós gostamos:The Farmer's Dog - Há alguns meses, começamos a alimentar Raven com comida fresca para cachorro e ela adora! Ganhe 50% de desconto no seu primeiro pedido de The Farmer's Dog.
Para obter uma lista de todos os suprimentos que recebemos para nossos novos filhotes de cães de serviço, confira nossa lista de verificação de novos filhotes no blog PuppyInTraining.com.
- Comportamento Animal
- Raças de Animais
- Nomes de Animais
- Adoção de Animais
- Treinamento de Animais
- Informações de Animais
- Saúde Animal
- Animais Adoráveis
- Cães
- Cão de gado australiano
- Dachshund gordo:seu cachorro está ganhando peso?
- Sintomas de sepse em cães
- Os gatos Scottish Fold são verdadeiramente hipoalergênicos? Fatos importantes para quem sofre de alergia
- Como saber se um monitor Savannah é homem ou mulher
- Apreciadores de répteis – Ajudando ou dificultando a conservação de répteis e anfíbios?
- Golden Retriever vs Labrador Retriever:Quais são as diferenças? (Com fotos)